Laravel on Lightsail Containers
Deploying a Laravel project with Docker to Lightsail Container

Introduction
I recently tried to get Laravel 11 running on AWS Lightsail Container. Mostly because I wanted to know how feasible it is for smaller production projects. I did not find many sources with this particular scenario, so I am sharing here for the case you struggle with the same. If you know any great articles going into this topic, please write me, I will link all good articles here.
First of all we will be using Laravel 11 with Postgres, but the steps are almost the same for MySQL and older Laravel versions.
We will use love-succulents.com throughout the article. Please replace the domain with your own, wherever applicable.
Database
First we need a database. Lightsail is offering MySQL and Postgres databases. Each of them is available as a single database or with high-availability (HA) with a standby in another region.
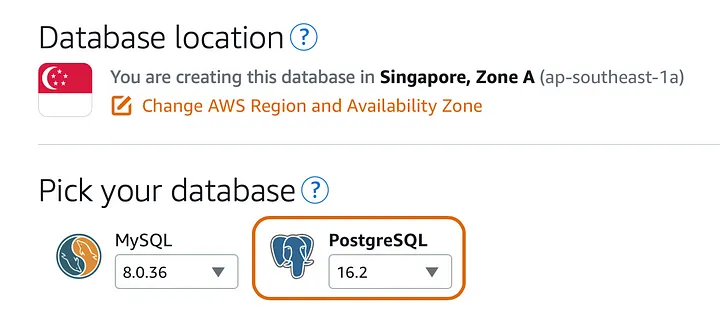
You can change the username, database name and password optionally. I will stick to the default values:
Username: dbmasteruser
Database: dbmaster
The smallest Postgres instances gives you 1 GB of memory, 2 vCPUs, 40 GB SSD and 100 GB data transfer — and all that for 15 USD monthly (if you choose Singapore as your region).
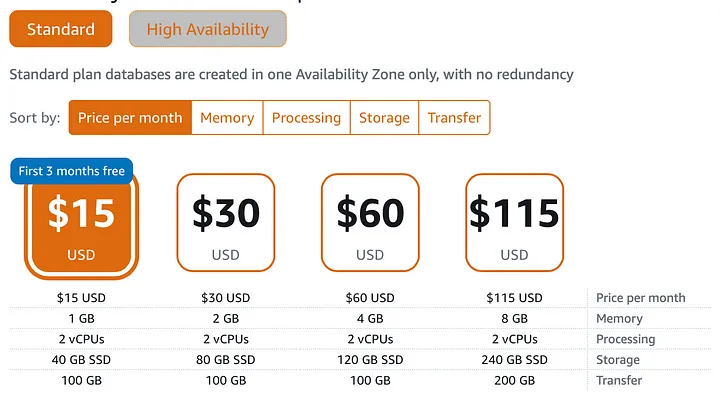
Click here for region specific pricing.
It will take a few minutes to create the database. After it is available, you can see the endpoint and the password in the interface. If you don’t absolutely need it, keep public mode disabled. We will explain later how you can run migrations and connect to your database in anyway.
Storage
One of the nice things about Laravel are the storage driver. We can simply store all our files in AWS S3, so that we don’t have to worry about our files when the instance goes down or there is a hardware failure in an underlaying instance. AWS Lightsail offers a S3 compatible version with a simplified pricing. When you create a new bucket you can only choose the region and the storage plan. The smallest one gives you 5GB of storage and 25 GB of data transfer for only 1 USD per month.
You also get simple metrics all over Lightsail. Here is an example for the bucket usage:
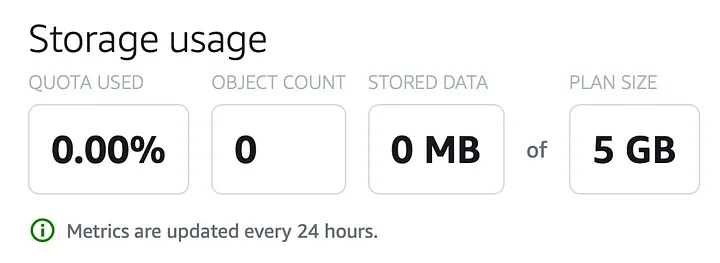
Furthermore AWS allows you to create alarms that notify you before you run out of storage. Note that SMS only works in certain regions, but email is supported everywhere.
Next we have to create one access key, which we will pass to Laravel via environment variables later on.

Domain
AWS provides you with a vanity URL for testing, but let’s add a real domain. Once you add a domain, Lightsail will provide you with the name server which you can update in your domain settings. You can easily move your DNS settings to Lightsail (Route 52 internally), it has a beautiful interface to manage your records and supports A, AAAA, CNAME, TXT, MX, NS and SRV.
Once you have created your first container, you can assign the domain to it. More about that later.
Under “Domains & DNS”, click on “Create DNS zone”. If you don’t have a domain yet, you can also register a new one there.
My domain is not registered with Route 53, so I choose “Use a domain from another registrar”:
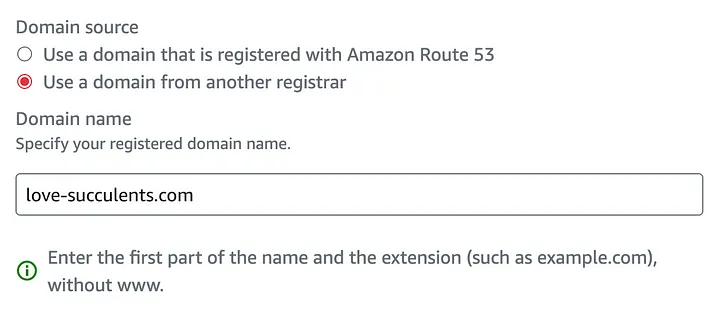
After you have created the DNS zone, you will see 4 NS records. You have to update these in the nameserver configuration of your domain provider (e.g. Cloudflare, GoDaddy). If you have any existing DNS records, add them first before updating the name-server records and wait for 48 hours.
Container
After you have chosen the region, you come to the scaling settings. I would recommend to go with at least the Micro size, as the nano size leaves too few resources for Laravel. If you only try it out, nano is fine though.
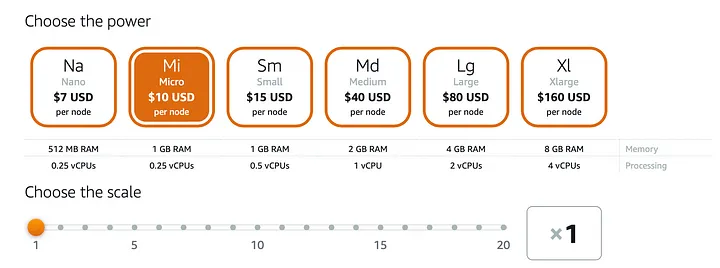
Create the container without deployment first.
After the container is available, go back to the domain management and assign the domain to the container service:
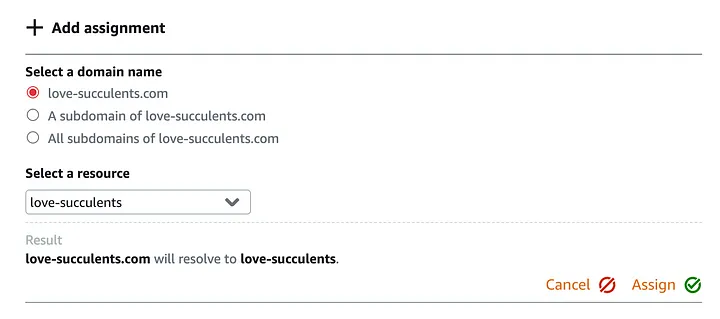
There are different ways how you can get your code onto the container:
- Docker Hub
- AWS ECR
- Manual deployment from local
Docker Hub gives you one private repository for free, but it requires special authentication. Unless you are working on an open source project and that doesn’t matter.
AWS ECR is the easiest choice if you don't want to deploy from your local environment (for example because you build your images with a Code Pipeline). Once you paste a ECR repository URL, Lightsail will ask you if it should configure the repository automatically with all required permissions. From my personal point of view this is the preferred way for deployments.
However for simplicity in this article, we will upload manually from our local environment, which entails building the Docker image and uploading it, but the process is almost the same for ECR. If you want to use ECR, simply use the push commands from the repository overview page.
I am using the AWS IAM Identity Center which is a wonderful and safe way to connect to your AWS accounts and resources. Once I am logged in, I can export the environment variables that will allow me to run all relevant CLI commands. You can set-up your local AWS profile and use IAM credentials instead of course. So for all following CLI commands I assume that you have exported the following three environment variables: AWS_ACCESS_KEY_ID, AWS_SECRET_ACCESS_KEY, AWS_SESSION_TOKEN or alternatively configured a default profile.
Now we can build our Docker images and upload them. I will link the files on GitHub to keep the focus of this article on AWS Lightsail.
Click here to access the Dockerfiles on GitHub
You can add the docker folder to your existing Laravel project or start a new Laravel 11 application. The Docker images use PHP 8.3, so older Laravel versions won’t work.
Next we build our NGINX and PHP-FPM Docker image:
docker buildx build -f docker/php/Dockerfile -t php-fpm --platform=linux/amd64 .
docker buildx build -f docker/nginx/Dockerfile -t nginx --platform=linux/amd64 .
Note that we use “buildx” and specify a platform. If you are building on another processor architecture that is required, otherwise you will experience start-up errors. We are using Amazon Linux 2023, so “linux/amd64” is the right choice.
Next we have to upload our images to AWS Lightsail:
aws lightsail push-container-image --region ap-southeast-1 --service-name YourContainerName --label php-fpm --image php-fpm:latest
aws lightsail push-container-image --region ap-southeast-1 --service-name YourContainerName--label nginx --image nginx:latest
After the upload is completed, we can proceed to create our deployment.
Out first container will be NGINX. We do not need to expose port 443 for SSL as AWS Lightsail will forward all traffic from SSL to port 80 automatically (once we created a certificate).
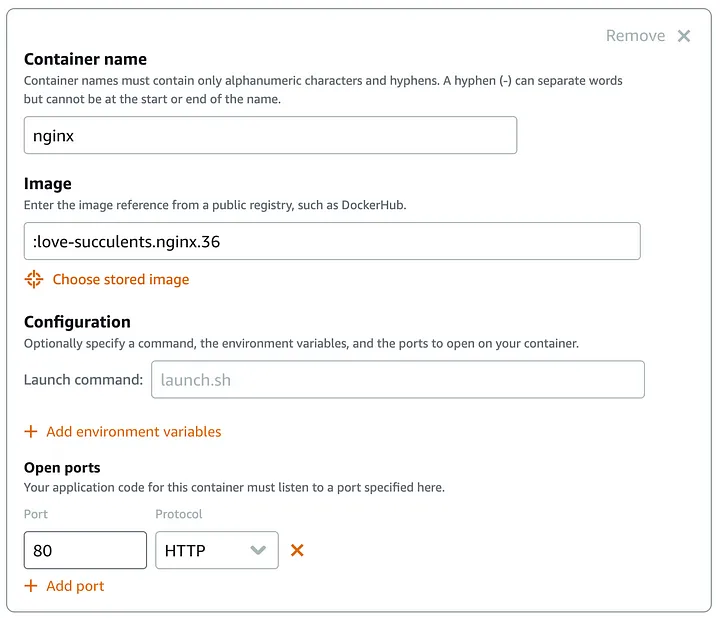
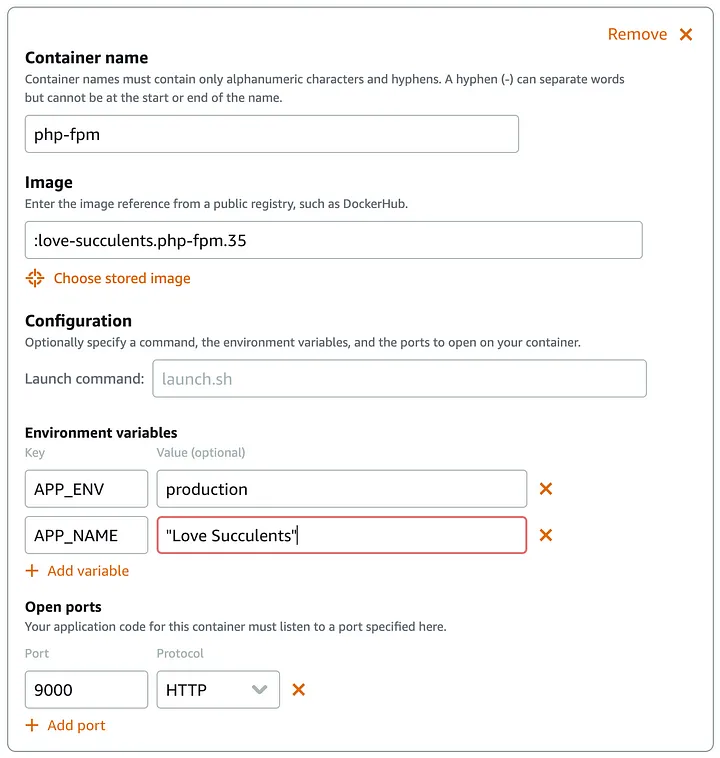
Out second container will be PHP-FPM:
Finally, we have to select the container that will be our public endpoint, which is our NGINX container:
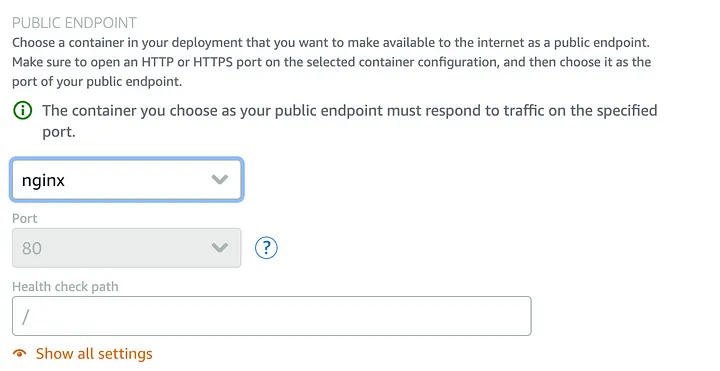
You can see only two environment variables in the screenshot, but actually you will need more.
APP_ENV=production
APP_NAME="Love Succulents"
APP_DEBUG=true
APP_KEY=base64,...
APP_URL=https://love-succulents.com

AWS_BUCKET=
AWS_ACCESS_KEY_ID=
AWS_SECRET_ACCESS_KEY=
AWS_DEFAULT_REGION=ap-southeast-1

DB_PORT=5432
DB_HOST=
DB_USERNAME=dbmasteruser
DB_CONNECTION=pgsql
DB_DATABASE=dbmaster
DB_PASSWORD=

SESSION_DRIVER=database
QUEUE_CONNECTION=sync
FILESYSTEM_DISK=s3
Note that it not advisable to set APP_DEBUG to true. It helps to analyse issues during deployment (e.g. failing database connection). Once your page is up and running, make sure to switch it back to false.
For the sake of simplicity I will copy the APP_KEY from my local Laravel project, but it should be generated via “php artisan key:generate” in the server (for example as part of the entrypoint).
For the AWS_* variables, fill in the key and secret that you generated during the “Storage” step — and also the bucket name and region you have chosen.
Finally enter the database credentials that you have created in the DB_* variables.
When the first deployment fails, you will have to create it again, including all environment variables. If that happens, do it step by step. Add the required ones first (for example, you won’t need the database and S3 to render the Laravel start page). Once one deployment was successful, you can edit the existing variables.
At this point you should see the Laravel start page (or your project’s starpage) when you click on the public domain. If there are errors, you can check the logs of each container. Look for the deployment number and scroll down from there. The logs will accumulate over time, so make use of the data filter.
SSL Certificate
Now that our deployment succeeded, we want to secure it with a SSL certificate. Head to the “Custom domains” section and click on “Create certificate”.
Once the certificate is available (it usually only takes a few minutes), you have to attach it:
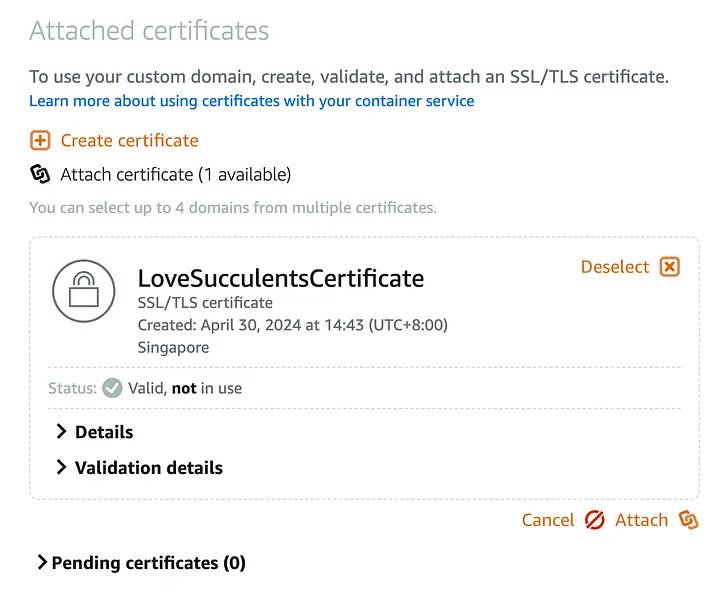
Now your domain is secured with an SSL certificate and available.
Troubleshooting
What if the deployment fails or I see an unexpected output?
The first deployment is the hardest as mentioned above already. Get familiar with the logs. You will find log entries specific to your container services like NGINX, PHP but also information about the deployment. It will tell you for example which deployment is in progress. Once a deployment started you will see when a new node is added. If the deployment fails it will try it a few times before failing. If your Docker image architecture is wrong it might only say that it “Took too long”. If there is a problem in your Dockerfile, you can see the output there as well. A typical example is that the entrypoint is missing permissions to execute. Another problem I saw in a lot of Stack Overflow articles is that bash is not installed. You can manually install it in your Dockerfile or simply use sh instead.
What if I want to connect to my database?
You can enable the public accessibility or you can create an instance. I would recommend to create an instance, set up a security rule to only allow SSH access from your IP and install the Postgres or MySQL client in there. From inside the instance you can securely connect to your database.
How much does it cost?
First of all it is worth mentioning that AWS gives you a lot of recourses for free for a limited time. To the time of writing you get small bucket for free for an entire year and an instance for three month.
The pricing is straight forward, but here a few examples:
Assuming you spin up one database in a single AZ with 1 small bucket and 1 container, the monthly cost is 23 USD per month (after you have depleted the free resources).
A more production ready setup for a small website or blog could look like this:
1 small node = 15 USD/ month
1 small database = 15 USD/ month
1 bucket with 100 GB = 3 USD/ month
What’s next?
When you website is growing, you can easily scale the resources with minimal downtime. The database automatically creates backups for you that you can restore to a new database. AWS Lightsail keeps 7 days of backups for you.
When you want to run migrations, invalidate route cache etc. you can put these instructions into the entrypoint script.
It’s getting more tricky when you need to run Artisan commands. One way is to modify your entrypoint to only run certain commands when an environment variable is set. This way you can control the execution via the AWS Lightsail interface.
If you need queue worker, you can add something like supervisord to your container.
If you find any mistakes or have improvements, please comment.
A word on privileged mode
There are certain use cases that hit the limits of Lightsail. For example the privileged mode for Docker is not available on Lightsail Containers. Therewith it won’t be possible to install something like a headless Chromium for Puppeteer to generate PDFs in Laravel.
